How to Change Oil Step by Step
Step 1 – Securely Lift the Vehicle
Option A: Drive Onto Car Ramps
- Park on a flat, solid surface.
- Align the ramps directly in front of the tires.
- Drive up slowly until the tires rest in the ramp grooves.
- Engage the parking brake and place wheel chocks behind the rear tires.
- Test stability by pushing the vehicle lightly from the side before going underneath.
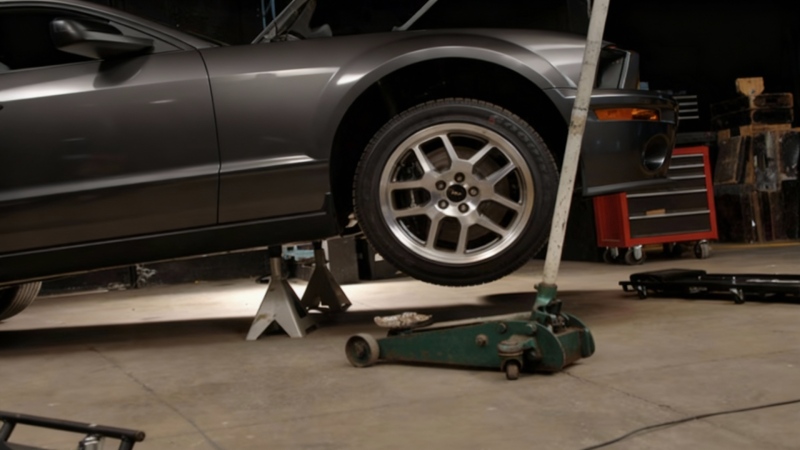
Option B: Raise with Jack and Stands
- Locate the official jack points (check the owner’s manual).
- Position the floor jack and lift the vehicle until the wheels clear the ground.
- Slide jack stands under the reinforced points of the frame.
- Lower the jack slightly so the stands support the weight.
- Leave the jack in place as a backup and confirm the car is stable before continuing.
Step 2 – Drain the Old Oil
Locate and Prepare
- Identify the oil drain plug at the lowest point of the oil pan.
- Remove any splash shields blocking access.
- Place the drain pan beneath the plug, slightly offset in the direction of oil flow.
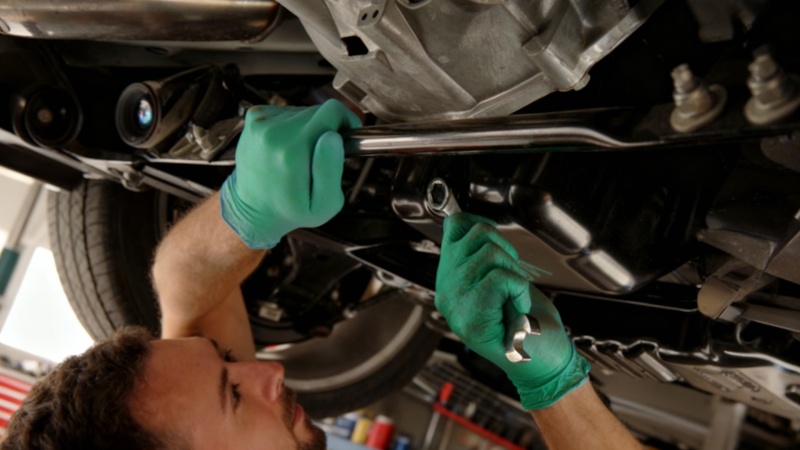
Remove the Plug
- Use the correct socket size (13–19 mm) to loosen the plug counterclockwise.
- Once loose, unscrew it by hand while applying light inward pressure.
- Pull the plug away quickly to avoid hot oil splashes.
Let It Drain Completely
- Allow 5–10 minutes for the oil to drain until it slows to a drip.
- Check the flow color and texture for metal flakes or sludge.
- Wipe the plug area clean once the flow stops.
Step 3 – Replace the Oil Filter
Spin-On Filter Replacement
- Locate the filter and position the drain pan below it.
- Use a filter wrench or cup tool to loosen, then remove by hand.
- Ensure the old rubber gasket is not stuck to the engine.
- Lightly oil the new gasket with fresh oil.
- Screw the new filter on by hand until snug, then tighten ¾ of a turn.
Cartridge Filter Replacement
- Remove the filter cap using the correct socket (24–32 mm).
- Pull out the old filter and replace the O-ring on the cap.
- Lightly oil the new O-ring and insert the new filter element.
- Reinstall the cap and torque to 18–25 ft-lbs, as specified.
Inspect the Housing
- Check the sealing surface for cracks, debris, or thread damage.
- Clean the area thoroughly before reassembly.
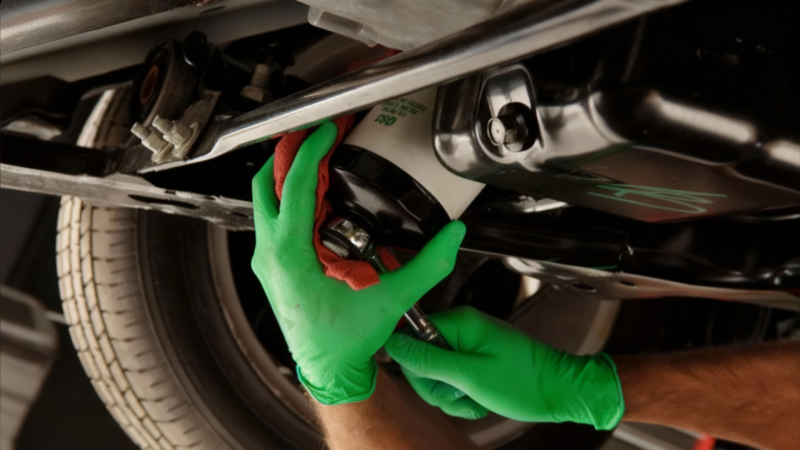
Step 4 – Reinstall the Drain Plug
- Inspect the threads on the plug and oil pan for wear or cross-threading.
- Clean the plug with a rag and install a new crush washer or gasket.
- Thread the plug by hand first to ensure smooth engagement.
- Tighten with a torque wrench to 25–30 ft-lbs (or manufacturer spec).
- Wipe the area clean and check for leaks or residue.
Table: Common Drain Plug Torque Specifications
|
Vehicle Manufacturer |
Typical Torque (ft-lbs) |
Notes |
|
Toyota / Lexus |
27–30 |
Use new aluminum crush washer each service. |
|
Honda / Acura |
29 |
Do not overtighten; replace washer every oil change. |
|
Nissan / Infiniti |
25–30 |
Confirm with manual; aluminum pans strip easily. |
|
Ford |
20–25 |
Some models specify torque in inch-lbs—check manual. |
|
Chevrolet / GMC |
18–24 |
Steel plugs with O-rings on newer models. |
|
BMW |
18–22 |
Replace copper or aluminum washer every time. |
|
Mercedes-Benz |
22–25 |
Use OEM washer and torque evenly. |
|
Volkswagen / Audi |
22–25 |
Many models use plastic or composite plugs—avoid overtightening. |
|
Hyundai / Kia |
25–30 |
Verify thread condition; replace washer as needed. |
|
Subaru |
31 |
Boxer engines require slightly higher torque; use proper crush washer. |
Step 5 – Confirm Completion
- Verify that both the drain plug and oil filter are securely tightened.
- Remove all tools and rags from under the car.
- Lower the vehicle carefully off the stands or ramps.
Step 6 – Add Fresh Oil
Use a Funnel Correctly
- Place a clean funnel into the oil filler opening on top of the engine.
- Pour the new oil slowly and steadily to prevent splashing or air bubbles.
- Keep a rag nearby to wipe away any spills immediately.
- After filling, remove the funnel and reinstall the oil filler cap securely.
- Dispose of any packaging and clean the workspace before moving on.
Add the Right Amount Gradually
- Check the oil capacity in the owner’s manual. Start by pouring about ¾ of the total amount.
- Wait 30–60 seconds to let the oil settle in the sump.
- Pull out the dipstick, wipe it clean, reinsert, and check the level.
- Add oil in small increments until the dipstick shows just below the maximum line.
- Avoid overfilling, as excess oil can cause foaming, leaks, or crankshaft drag.
Step 7 – Start the Engine and Verify Operation
Perform the First Start Safely
- Ensure the drain plug and oil filter are both secure.
- Start the engine and let it idle for 20–30 seconds.
- Watch the oil pressure warning light on the dashboard. It should turn off within a few seconds.
- Listen for any unusual ticking or knocking sounds, which may indicate low oil pressure or leaks.
- If any abnormal noise or light persists, shut off the engine immediately and recheck all connections.
Confirm Oil Pressure and Circulation
- After a short idle period, turn off the engine and wait two minutes.
- Inspect under the car for oil drips or wet spots around the drain plug and filter.
- A quick visual check ensures that the system is sealed and oil has circulated properly.
Step 8 – Finalize the Oil Level

Read the Dipstick Accurately
- Wait about five minutes after engine shutdown to let the oil drain back into the pan.
- Pull the dipstick out, wipe it clean with a lint-free cloth, and reinsert it fully.
- Remove it again and check where the oil film ends.
- The correct level should fall between the minimum and maximum marks.
Top Off to Perfection
- If the level is near the minimum line, add oil slowly in small amounts (about half a cup at a time).
- Recheck the dipstick after each addition until the oil line reaches just below the maximum mark.
- Do not exceed the maximum mark—slightly below full is ideal for expansion during operation.
- Once correct, reinstall the dipstick and oil cap firmly.
Step 9 – Complete the Process
- Wipe any remaining oil residue around the filler area.
- Record the date, mileage, oil brand, viscosity, and filter type in your maintenance log.
- Dispose of the used oil and filter responsibly at a recycling center or auto parts store.
- Take the car for a short, gentle drive to confirm smooth performance and stable pressure.
Following these steps ensures the engine is correctly filled, the oil system is sealed, and the job meets professional-quality standards. Clean execution and careful verification at each stage guarantee a reliable, leak-free result.
Introduction – Why Oil Changes Are Critical for Engine Health
The Fundamental Role of Engine Oil
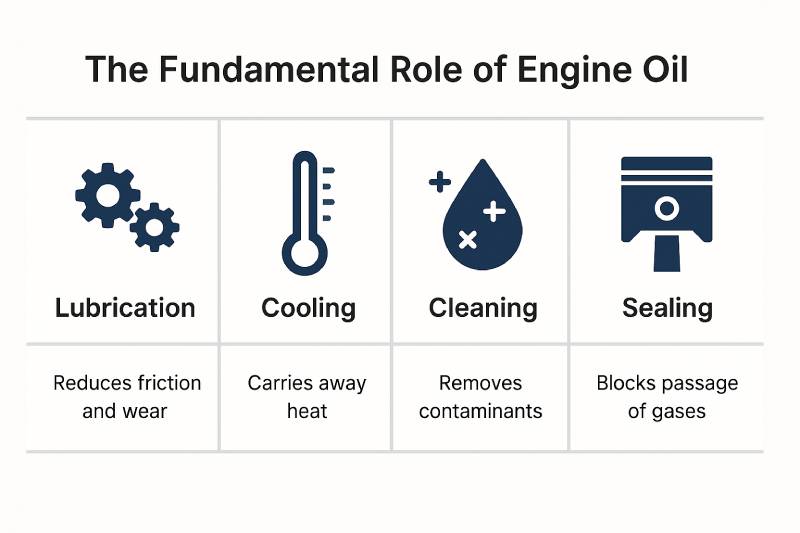
- Engine oil is the lifeblood of any internal combustion engine. Its first and most vital function is lubrication. A thin oil film forms between moving metal parts such as pistons, crankshafts, and bearings. This layer reduces friction, prevents wear, and allows the engine to run smoothly under high loads and temperatures. Without proper lubrication, parts grind against each other, creating heat and microscopic metal debris that quickly destroy internal components.
- The second key function is cooling. While the cooling system handles most heat dissipation, oil carries away excess heat from hard-to-reach areas such as pistons and valve trains. By circulating through the engine and returning to the oil pan, it stabilizes operating temperature and prevents local overheating.
- Oil also plays a cleaning role. It collects dirt, carbon particles, and metal shavings that form during combustion and friction. The oil filter then traps these impurities, keeping the internal system clean and preventing buildup that can block vital oil passages.
- Finally, oil provides sealing. It fills microscopic gaps between pistons, rings, and cylinder walls, ensuring optimal compression and preventing combustion gases from leaking into the crankcase. This sealing effect maintains power efficiency and reduces emissions.
Together, these four functions protect the engine from premature wear, overheating, and contamination. High-quality oil keeps moving components synchronized and shields them from the extreme mechanical stress every engine endures.
Table: The Four Primary Functions of Engine Oil
|
Function |
Description |
Practical Example |
|
Lubrication |
Creates a thin film between moving engine parts to reduce friction and prevent metal-to-metal contact. |
Protects crankshaft bearings and camshafts from wear. |
|
Cooling |
Carries heat away from pistons, valves, and bearings to maintain safe operating temperatures. |
Complements the cooling system by reducing localized heat buildup. |
|
Cleaning |
Suspends carbon, dirt, and metal particles, keeping them from forming sludge and deposits. |
Works with the oil filter to remove contaminants during circulation. |
|
Sealing |
Fills microscopic gaps between piston rings and cylinder walls to maintain compression and efficiency. |
Prevents loss of combustion pressure and improves power output. |
Driving with old oil can destroy an engine within minutes once the pressure drops.
The Cost of Neglecting Oil Changes
Failing to change engine oil regularly leads to silent but severe damage. Over time, oil loses its lubricating properties, thickens, and fills with contaminants. The result is metal-to-metal contact inside the engine, which causes rapid wear of bearings, pistons, and camshafts. This can escalate into bearing failure, valve damage, and eventually engine seizure—a catastrophic condition where internal parts weld together due to heat and friction.
Neglected oil changes also lead to sludge buildup. Sludge blocks oil passages, reducing flow and starving critical components of lubrication. Once the oil pump or filters are clogged, pressure drops, and internal damage occurs within minutes of running the engine.
According to industry research, 22% of engine failures result from improper oil maintenance. What starts as a small oversight can end with a complete engine replacement that may cost thousands of dollars—often more than the value of the car itself.
Regular oil changes are therefore not an optional task but a fundamental investment in engine longevity. Every oil change refreshes the protection layer inside your engine, preventing the costly and irreversible damage that neglect inevitably brings.
Table: Cost Comparison – Regular Maintenance vs. Engine Failure
|
Maintenance Action |
Average Cost (USD) |
Frequency |
Long-Term Impact |
|
Regular Oil Change |
$50–$70 |
Every 5,000–7,500 miles |
Maintains lubrication, prevents wear, and extends engine life. |
|
Skipped Oil Change |
$0 saved short term |
— |
Leads to sludge buildup and reduced oil pressure. |
|
Engine Bearing Repair |
$1,200–$2,500 |
Once after failure |
Requires partial engine disassembly and machining. |
|
Full Engine Rebuild |
$4,000–$7,000+ |
Once after catastrophic failure |
Includes pistons, rings, crankshaft, and gaskets; may exceed car’s value. |
Spending $60 twice a year on oil changes can prevent thousands in engine repairs and preserve your vehicle's resale value.
Understanding Engine Oil – The Science Behind Lubrication
Oil Viscosity Grades Explained (SAE Ratings)
Viscosity defines how easily oil flows at different temperatures. The Society of Automotive Engineers (SAE) created a standardized rating system to classify oil viscosity, expressed through labels like 0W-20, 5W-30, or 10W-40.
The first number, followed by the letter “W” (meaning winter), indicates how the oil performs in cold conditions. A lower number, such as 0W or 5W, means the oil remains thinner and flows more easily when the engine is cold, improving startup lubrication. The second number represents the oil’s thickness at operating temperature. A higher number, such as 40 or 50, means the oil maintains more body when hot, providing better protection under load.
For example, 5W-30 oil behaves like an SAE 5 at cold temperatures and an SAE 30 once the engine is warm. This dual behavior is achieved through special additives called viscosity index improvers that adjust oil performance across temperatures.
Multigrade oils like 5W-30 are standard in modern vehicles because they provide reliable flow in both winter and summer, protecting the engine from cold-start wear and high-temperature thinning. Monograde oils, such as SAE 30 or SAE 40, lack these additives and are used primarily in older engines, lawn equipment, or stable-climate applications where temperature changes are minimal.
Correct viscosity is critical. Oil that is too thick may struggle to reach vital components on cold starts, while oil that is too thin may lose its protective film under high heat. Always follow the manufacturer’s recommended SAE grade for your specific vehicle and climate.
Always check oil cap or manual before buying. Wrong viscosity is a common cause of cold-start damage.
Conventional vs. Synthetic vs. Semi-Synthetic Oil
Conventional Oil Characteristics
Conventional oil, also called mineral oil, is refined directly from crude petroleum. It offers reliable protection for standard engines and has been the industry baseline for decades. Its molecular structure is irregular, which means it thickens faster under heat and breaks down sooner compared to synthetic options.
Typical change intervals range from 3,000 to 5,000 miles, depending on driving conditions. It is more affordable than synthetic oils, making it suitable for older vehicles, those with simpler engines, or drivers on a budget who perform frequent changes. However, it provides less stability under extreme temperatures and may form sludge faster if neglected.
Full Synthetic Oil Benefits
Full synthetic oil is engineered in laboratories using uniform molecular structures that resist oxidation, thermal breakdown, and sludge formation. It flows smoothly at low temperatures and maintains viscosity under extreme heat, making it ideal for high-performance engines and modern vehicles with tighter tolerances.
Synthetics can last 7,500 to 10,000 miles or more between oil changes, depending on the manufacturer’s specifications. Though it costs more upfront, the extended lifespan and superior protection often reduce overall maintenance costs. Drivers benefit from improved fuel efficiency, reduced wear, and easier cold starts in any climate.
Synthetic Blend Advantages
Synthetic blend oil combines conventional and synthetic base oils. It delivers many of the benefits of full synthetic—better resistance to oxidation and improved performance in both hot and cold weather—while keeping costs lower.
This hybrid approach makes synthetic blends a smart choice for vehicles driven in moderate conditions or older engines transitioning from conventional to synthetic. It is also useful for drivers who want improved protection without committing to the higher cost of full synthetic.
Table: Comparison of Oil Types
|
Oil Type |
Best For |
Typical Change Interval |
Cost Range (USD per change) |
|
Conventional (Mineral) |
Older vehicles, light-duty driving, low-mileage engines |
Every 3,000–5,000 miles |
$35–$60 |
|
Full Synthetic |
Modern engines, high-performance or turbocharged vehicles, extreme temperatures |
Every 7,500–10,000+ miles |
$70–$120 |
|
Synthetic Blend (Semi-Synthetic) |
Drivers seeking balance of performance and cost, moderate conditions |
Every 5,000–7,500 miles |
$55–$80 |
|
High-Mileage Oil |
Vehicles with over 75,000 miles, engines prone to minor leaks or oil consumption |
Every 5,000–6,000 miles |
$60–$90 |
Specialized Oil Types
High-Mileage Oil for Vehicles Over 75,000 Miles
Engines with significant mileage develop small internal leaks, hardened seals, and higher oil consumption. High-mileage oil addresses these issues with seal conditioners that rejuvenate rubber components and help reduce leaks. It also contains detergents and anti-wear additives that dissolve sludge and protect aging metal surfaces.
These oils are slightly thicker, enhancing film strength and reducing the amount of oil that burns off in the combustion chamber. For vehicles over 75,000 miles (120,000 km), high-mileage oil can extend engine life, reduce smoke, and improve compression stability.
High-mileage oil is thicker; avoid using in engines under 50,000 miles.
Engine Break-In Oil for New or Rebuilt Engines
When a new or rebuilt engine is first operated, its internal parts need controlled wear to achieve proper seating. Break-in oil is formulated for this process. It contains elevated levels of ZDDP (zinc dialkyldithiophosphate), a compound that minimizes scuffing while allowing enough friction to polish metal surfaces precisely.
This oil should only be used during the initial 500–1,000 miles or as specified by the engine builder. After the break-in period, it must be replaced with the manufacturer-recommended oil type. Continuing to use break-in oil can reduce long-term protection, as its additive balance is designed for short-term conditioning rather than extended service.
Engine oil science blends chemistry, engineering, and practical maintenance. Understanding viscosity grades and oil types allows you to choose the right formulation for your vehicle’s specific needs, ensuring both immediate performance and long-term engine durability.
Oil Change Intervals and Scheduling
Manufacturer Recommendations vs. Real-World Conditions
Every car has a specific oil change interval determined by the manufacturer. The most accurate source is the owner’s manual, which lists the mileage or time limit (for example, every 7,500 miles or once a year). You can also find this information on the manufacturer’s official website, service center stickers, or vehicle maintenance logs.
The old 3,000-mile rule once applied to older engines that used conventional oil, but it is now outdated. Advances in engine design, synthetic oil technology, and additive chemistry allow modern cars to go much farther between changes. Many vehicles now have recommended intervals of 5,000 to 15,000 miles, depending on the oil type and engine system.
However, these figures assume ideal conditions. In reality, factors such as weather, driving habits, and maintenance quality can shorten an oil’s lifespan. Following the manufacturer’s guideline while staying alert to signs of oil degradation—such as darker oil color, unusual engine noise, or low pressure warnings—is the best strategy for maintaining reliability.
Severe Driving Conditions That Require More Frequent Changes
Environmental Factors
Some environments accelerate oil breakdown and contamination. Extreme heat causes oil to oxidize and thin faster, reducing its ability to lubricate properly. In contrast, very cold climates thicken the oil, making it harder to circulate during startup and increasing engine wear.
Dusty or sandy areas can introduce abrasive particles that the filter cannot fully capture, leading to sludge and premature wear. High humidity contributes to moisture buildup inside the crankcase, which can mix with combustion byproducts to form acids. These acids corrode internal components and degrade the oil’s protective qualities.
Drivers in these environments should shorten oil change intervals by 25–50% to maintain clean lubrication and prevent damage.
Driving Pattern Factors
Oil life is also affected by how a car is driven. Frequent short trips, especially those under five miles, prevent the engine from reaching full operating temperature. This allows fuel and moisture to accumulate in the oil, causing dilution and sludge formation.
Stop-and-go traffic, towing heavy loads, or high-performance driving all increase engine stress and heat, accelerating oil oxidation. Extended idling, common in delivery or ride-share vehicles, exposes the oil to continuous combustion heat without proper cooling airflow.
In these cases, changing oil every 3,000–5,000 miles is often necessary, even with synthetic formulations. Severe driving conditions require more vigilance because they place greater strain on every part of the lubrication system.
- Read the manual
- Check oil color monthly
- Consider the environment
Oil Life Monitoring Systems
Modern vehicles often come equipped with electronic oil life monitoring systems that calculate remaining oil life based on multiple data points, including mileage, engine temperature, start cycles, load, and driving patterns. These systems do not directly measure oil quality but instead use algorithms to estimate when the oil should be changed.
For example, a car driven mostly on highways at steady speeds will have longer oil life than one used for city commuting. When the monitor indicates a low oil life percentage—often around 15%—it is time to plan the next service.
While these systems are accurate for most drivers, they should not replace visual checks or maintenance awareness. If the oil appears dirty, smells burnt, or the vehicle operates under severe conditions, it is wise to perform the change earlier. Relying solely on the system without occasional verification can risk running the engine on degraded oil.
Reset the oil life indicator manually after each change.
Essential Tools and Equipment for DIY Oil Changes
Basic Hand Tools Required
Wrenches and Sockets
Most oil drain plugs require a socket or box wrench ranging from 13 mm to 19 mm, depending on the make and model of the vehicle. It is important to use a six-point socket rather than a twelve-point to prevent rounding the edges of the plug. For most cars, a 3/8-inch drive ratchet provides enough leverage and control for loosening and tightening.
To avoid over-tightening or stripping threads, a torque wrench is essential. Manufacturers usually specify torque between 25 and 30 ft-lbs for drain plugs, although some may differ. Setting the correct torque ensures the plug seals properly without damaging the oil pan threads or crushing the washer. Investing in a reliable torque wrench pays off through accurate, repeatable results and long-term prevention of costly thread repairs.
Oil Filter Removal Tools
Oil filters come in several shapes and locations, which means access can vary widely. The three most useful removal tools are:
- Oil filter strap wrench: Works on most cylindrical filters and adjusts to different sizes. Ideal when space allows a wide swing for leverage.
- Oil filter pliers: Provide a firm grip on tight or stuck filters, especially in hard-to-reach areas. However, they can crush the filter body if used with too much force.
- Cup-type oil filter wrench: Designed to fit over the end of a filter like a socket, providing the most secure engagement and minimal risk of slippage. Excellent for filters recessed in tight spaces.
Selecting the right tool depends on accessibility and filter type. Always inspect the rubber gasket to ensure it comes off with the old filter before installing the new one.
Safety Equipment and Lifting Devices
Vehicle Lifting Options
Raising the car properly is crucial for both safety and efficiency. The three main lifting methods are:
- Car ramps: The safest option for beginners. They offer a stable incline for front-wheel or rear-wheel access. Always use wheel chocks behind the opposite tires to prevent rolling.
- Floor jacks: Provide greater flexibility and can lift any corner of the vehicle. Use only on designated jack points listed in the owner’s manual. Never rely solely on a jack to hold the vehicle.
- Jack stands: Used together with a floor jack to support the car securely. They must match or exceed the vehicle’s weight rating (commonly 2 to 3 tons). Once in place, slightly lower the jack until the stands bear the full load.
Before crawling underneath, shake the car gently to confirm it is stable. A secure lift setup prevents the most serious DIY accidents.
Personal Protective Equipment
Oil changes involve exposure to hot surfaces, chemicals, and sharp metal edges. Nitrile gloves protect your hands from burns, used oil, and chemical additives, while safety glasses guard against splashes during draining or filling. Avoid loose clothing that could catch on components, and wear closed-toe shoes with firm traction.
Used motor oil contains contaminants, so handling it safely prevents skin irritation and long-term health risks. Keep a few shop towels and a small container of hand cleaner nearby for quick cleanups.
Oil Collection and Disposal Equipment
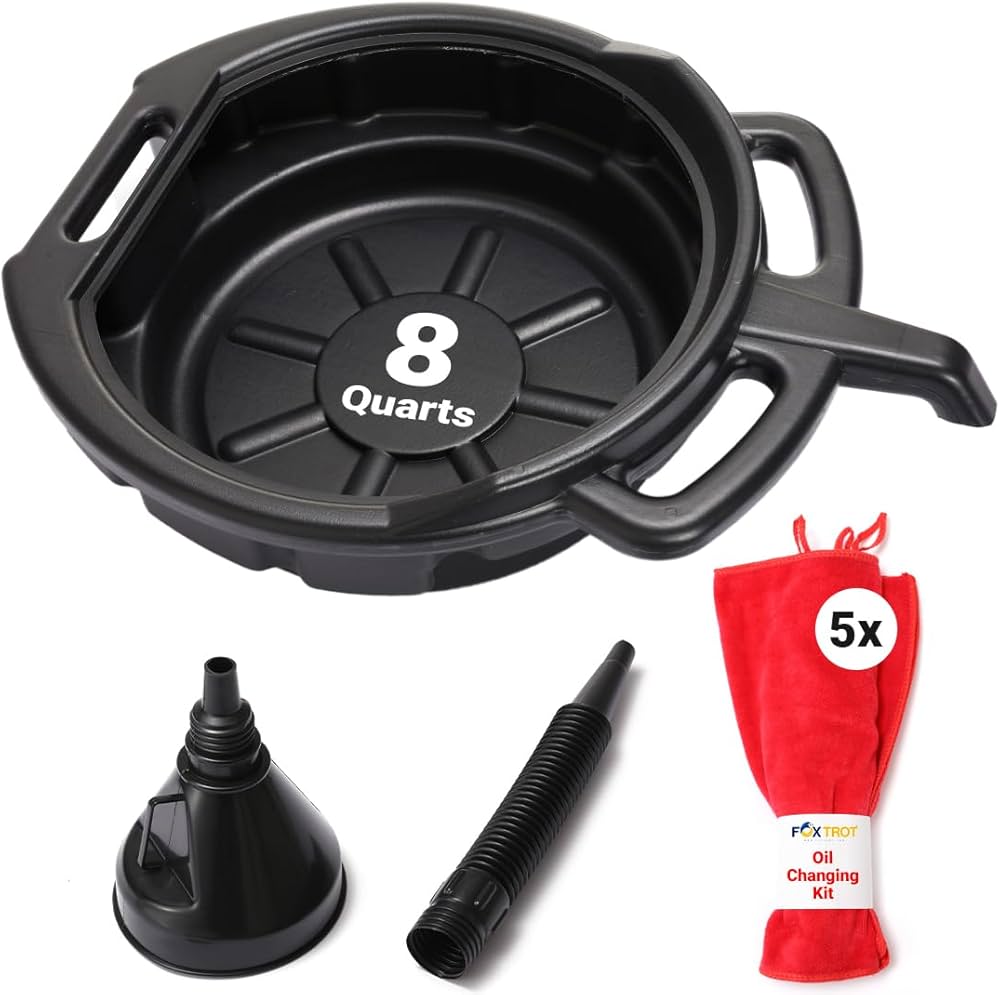
Proper containment and recycling of used oil are vital for both cleanliness and environmental responsibility. A drain pan with a capacity of at least 10 quarts (9.5 liters) ensures there is enough room for the oil and prevents overflow. Look for a pan with a built-in spout or screw cap for easy pouring into a recycling container.
When refilling the engine, use a funnel with a long neck to control flow and minimize spills, especially in cars with tight filler openings. Keep the funnel clean to avoid introducing debris into the fresh oil.
Store used oil in a sealed plastic container, such as the original oil bottle or a dedicated recycling jug. Never dispose of oil in drains, soil, or trash. Most auto parts stores and service centers accept used oil and filters for free recycling.
- Wear nitrile or mechanic gloves to protect your hands from hot oil, chemicals, and sharp edges
- Use safety glasses to prevent oil splashes or debris from reaching your eyes
- Lift the vehicle securely with car ramps or a floor jack. Always confirm the weight rating exceeds your vehicle's weight
- Support the vehicle with jack stands—never rely on the jack alone. Place them on solid, level ground at manufacturer-approved lift points
- Place wheel chocks behind the tires to prevent any rolling movement
- Keep a fire extinguisher nearby as an optional but smart precaution
Never work under a vehicle that isn't fully secured on jack stands or ramps. Stability must be confirmed before going underneath.
Vehicle-Specific Oil Requirements
European Vehicle Specifications (BMW, Mercedes, Audi, VW)
European engines are engineered for high performance, long service intervals, and strict emission standards. Because of this, they require oils that meet specific manufacturer approvals, not just general industry standards. Using an oil without the correct approval can affect engine protection and even void the manufacturer’s warranty.
For BMW, the most common specifications are BMW Longlife-01 (LL-01) and BMW Longlife-04 (LL-04). LL-01 oils are designed for gasoline engines with extended change intervals of up to 15,000 miles (25,000 km). LL-04 oils are formulated for modern diesel and turbocharged engines with particulate filters, emphasizing low-ash content to protect emission systems.
Mercedes-Benz uses the MB 229.x standard series. MB 229.5 applies to high-performance gasoline engines, offering long drain intervals and high oxidation resistance. MB 229.51 and MB 229.52 are low-SAPS (sulfated ash, phosphorus, sulfur) variants for diesel engines equipped with DPF systems.
Volkswagen and Audi specify oils under the VW 502.00 / 505.00 / 504.00 / 507.00 standards. VW 504.00 and 507.00 are the latest approvals for engines with extended oil change intervals, supporting modern emission control systems and minimizing deposits under high temperatures.
These European standards are far more precise than generic API SN or ILSAC GF-6 ratings. Using oil without the required certification can lead to improper lubrication, increased wear, or malfunction of sensitive systems like turbochargers and particulate filters. Always verify the exact specification listed in the owner’s manual before selecting an oil for a European vehicle.
American Vehicle Requirements (Ford, GM, Chrysler)
American manufacturers often focus on broader operating conditions and cost-effective maintenance. Their oils must meet both API (American Petroleum Institute) and ILSAC (International Lubricants Standardization and Approval Committee) standards.
The API system identifies oil quality through a two-letter code such as API SN, SP, or CK-4 (for diesel). The first letter refers to the engine type (S for gasoline, C for diesel), and the second indicates the performance level—the further down the alphabet, the more advanced the protection. Modern gasoline engines require API SP, which provides improved wear resistance, oxidation stability, and low-speed pre-ignition control for turbocharged direct-injection engines.
ILSAC GF-6 is another critical standard, emphasizing fuel efficiency, deposit control, and emission system protection. Oils meeting GF-6A are backward compatible, while GF-6B is for low-viscosity oils like 0W-16.
Each automaker also defines proprietary specifications:
- Ford uses WSS-M2C946-A/B1 and WSS-M2C961-A1 for modern EcoBoost engines that demand high-temperature stability.
- General Motors introduced dexos1 Gen 3 for gasoline engines and dexos2 for diesels. Dexos-approved oils ensure compatibility with GM’s extended drain systems and turbocharged designs.
- Chrysler recommends MS-6395 for most gasoline vehicles, aligning closely with API SP and ILSAC GF-6 standards.
Using oils certified under these standards ensures engines remain efficient, emission systems stay protected, and warranties remain valid.
Asian Vehicle Specifications (Honda, Toyota, Nissan)
Asian manufacturers often design engines with tighter tolerances, focusing on fuel economy, smooth operation, and long-term reliability. These engines typically use low-viscosity oils, especially 0W-20, to reduce friction and improve cold-start efficiency.
Honda recommends oils that meet API SP / ILSAC GF-6 and often labels them as Honda Genuine Motor Oil 0W-20. These oils include specific detergent packages and friction modifiers suited for VTEC and turbo engines.
Toyota and Lexus models also specify 0W-20 or 0W-16 oils, with formulations designed to support hybrid systems where frequent engine start-stop cycles demand rapid lubrication response. Using heavier oil can affect performance, increase fuel consumption, and trigger warning lights in hybrids or variable-valve systems.
Nissan and Infiniti often use 0W-20 or 5W-30 oils that meet Nissan Genuine Motor Oil standards, emphasizing protection under turbocharging and direct injection. Some Nissan engines require additional friction modifiers to minimize timing chain wear, a problem common in older designs.
While most Asian cars accept API or ILSAC-compliant oils, manufacturers encourage genuine or approved equivalents for best long-term performance. Using the specified viscosity and additive formula ensures smoother operation, better mileage, and protection across a wide temperature range.
Choosing oil based on brand-specific standards is crucial for modern engines. Every manufacturer designs its engines with particular viscosity ranges, additive chemistry, and change intervals in mind. Following those guidelines ensures full protection, peak efficiency, and uninterrupted warranty coverage.
Pre-Oil Change Preparation
Oil can stay hot up to 30 minutes after shutdown.
Vehicle Positioning and Safety Setup
Level Ground Requirements
Performing an oil change on level ground is essential for both safety and precision. When a vehicle sits unevenly, old oil can remain trapped in corners of the oil pan instead of draining completely. This leaves behind contaminants that reduce the effectiveness of the fresh oil. A flat surface allows full drainage, ensuring that nearly all of the used oil exits through the drain plug.
Level positioning is also vital when checking the oil level after the change. Dipstick readings depend on gravity and fluid distribution. If the car tilts forward, backward, or sideways, the reading may appear higher or lower than the actual level. This can lead to overfilling or underfilling, both of which harm the engine.
Whenever possible, perform the oil change on a solid, flat driveway or garage floor. If ramps or jack stands are used, ensure both sides of the vehicle are elevated evenly to maintain balance and accuracy.
Engine Warm-Up Procedures
Oil flows more easily when slightly warm, so it is best to change it when the engine has reached normal operating temperature, then cooled for a few minutes. Warm oil carries suspended contaminants that drain out more completely, leaving the crankcase cleaner.
The ideal process is to start the engine and let it idle for 3–5 minutes. This brings the oil up to roughly 100–120°F (38–49°C)—warm enough to flow freely but not dangerously hot. Avoid running the car longer, as oil near full temperature (around 200°F / 93°C) can cause burns and make components too hot to handle safely.
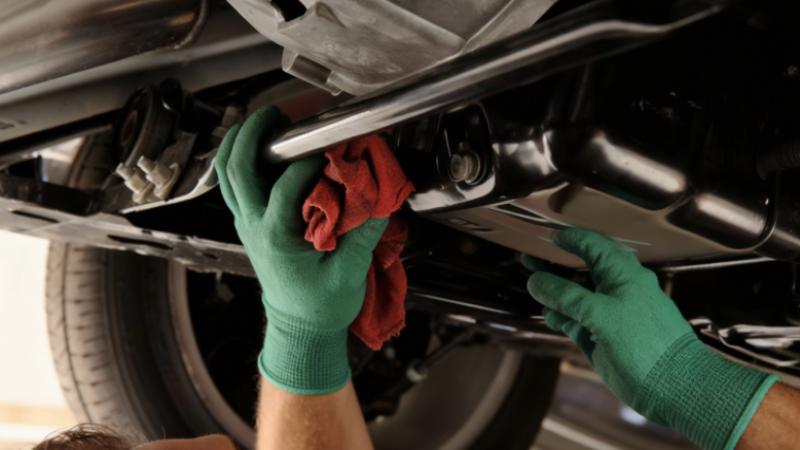
After shutting off the engine, wait another 5–10 minutes before beginning work. This allows the exhaust system and oil pan to cool slightly while keeping the oil warm enough for smooth draining. Always wear gloves and use caution when reaching near the drain plug or filter, as these parts retain heat longer than expected.
Gathering Materials and Information
Determining Oil Capacity and Type
Every engine requires a precise quantity and grade of oil. To find this information, consult the owner’s manual, usually in the “Lubrication” or “Maintenance” section. It lists both capacity (for example, 4.5 quarts or 4.3 liters with filter change) and recommended viscosity (such as 5W-30 or 0W-20).
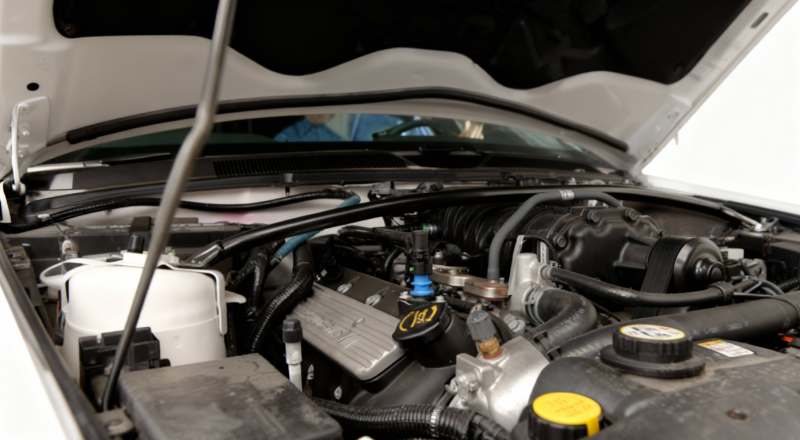
If the manual is unavailable, check under the hood for a service label or door jamb stickers that specify oil type. Many manufacturers also provide digital resources where you can enter your vehicle identification number (VIN) or model details to view the correct specifications.
Online resources like manufacturer websites, reputable automotive databases, or oil brand “finder” tools (from Castrol, Valvoline, or Mobil) can confirm compatibility. Using the correct oil ensures optimal lubrication, fuel efficiency, and emission system protection.
Parts Identification and Procurement
Before starting, gather all necessary components to avoid interruptions mid-task. The essential parts include:
- Oil filter – Choose one specifically designed for your car’s make, model, and engine size. Filters vary in thread pitch, sealing diameter, and height. You can find the correct part number in the owner’s manual or through online databases from major filter manufacturers such as Fram, Bosch, or Mann.
- Drain plug washer or gasket – Many vehicles use a crush washer that deforms slightly to create a seal. Always replace it during each oil change to prevent leaks.
- Replacement drain plug (optional) – If the old plug shows rounded edges or damaged threads, replace it with an OEM-spec unit to ensure a tight fit.
Check all parts for authenticity and quality before installation. Having the correct materials on hand streamlines the process and prevents mistakes that could compromise the oil seal or cause future leaks.
Proper preparation before an oil change saves time, prevents spills, and ensures complete removal of used oil. A stable vehicle position, warm but safe oil temperature, and the right tools and parts make the procedure both efficient and reliable.
Oil Filter Types and Selection
Spin-On vs. Cartridge Filter Systems
Spin-On Filter Advantages and Disadvantages
Spin-on filters are the most common type used in vehicles built before the widespread adoption of modular filter housings. They come as a sealed metal canister that contains the filtering element, gasket, and anti-drainback valve inside one unit.
Advantages:
- Easy installation and removal. The entire filter is replaced as a single piece. It can be installed by hand and requires minimal tools.
- Clean and convenient. Each replacement comes with a new gasket, ensuring a proper seal every time.
- Fast service. Ideal for quick oil changes or DIY maintenance, as the process takes only a few minutes.
Disadvantages:
- Less environmentally friendly. The metal canister and trapped oil must be properly recycled to avoid contamination.
- Higher replacement cost. The integrated metal housing makes it slightly more expensive than cartridge elements.
- Bulky design. Can be harder to fit in tight engine compartments found in modern cars.
Spin-on filters remain a practical option for older and mid-range vehicles where convenience and simplicity are priorities.
Cartridge Filter Benefits and Challenges
Cartridge filters consist only of the internal filter element, which is inserted into a reusable housing. This design is increasingly common in European and Asian vehicles due to environmental standards and material efficiency.
Benefits:
- Eco-friendly construction. Only the paper or synthetic element is replaced, reducing metal waste and oil contamination.
- Lower long-term cost. Replacement elements are often cheaper than complete spin-on filters.
- Better inspection ability. The exposed filter can be visually checked for metal debris or sludge, offering insight into engine condition.
Challenges:
- More complex installation. Requires correct placement of O-rings and attention to torque specifications for the housing cap.
- Specialized tools. Usually needs a 24–32 mm socket for removal, depending on the manufacturer.
- Higher risk of leaks. Incorrect O-ring positioning or excessive torque can cause sealing problems.
Cartridge filters suit modern engines designed for precision and environmental efficiency but require careful handling and the right tools.
Silicone anti-drainback valves last longer than rubber.
Filter Quality and Performance Differences
Filter Media Types
The filter media determines how efficiently contaminants are removed and how long the filter lasts. There are three main types:
- Paper (cellulose) media: Made from natural fibers, these are affordable and effective for short oil change intervals (around 3,000–5,000 miles). However, they clog faster and have lower particle capture efficiency.
- Synthetic media: Built from micro-glass or polyester fibers, these filters remove smaller contaminants (down to 10 microns) and maintain consistent flow, even when partially clogged. They last up to 10,000 miles or more.
- Hybrid media: Combine paper and synthetic fibers, offering balanced performance, durability, and cost efficiency. They provide longer life and better filtration than cellulose alone without the full cost of synthetic.
When choosing, consider oil type and driving conditions. Synthetic oils pair best with synthetic or hybrid filters for extended service intervals.
Anti-Drainback Valve Importance
The anti-drainback valve (ADBV) is a key feature in many oil filters, particularly those mounted horizontally or upside down on the engine. Its job is to prevent oil from draining out of the filter when the engine is off.
This feature ensures that the oil system remains primed, so lubrication reaches engine components immediately upon startup. Without it, the engine would experience a brief dry start each time, which accelerates wear on bearings and camshafts.
To identify filters with an anti-drainback valve:
- Check the product label for “non-return valve” or “anti-drainback valve.”
- Look for a silicone valve (orange or red) instead of a rubber one, as silicone stays flexible in extreme temperatures.
High-quality filters with reliable ADBVs provide better cold-start protection, longer engine life, and improved oil system integrity between changes.
Common Oil Change Mistakes and How to Avoid Them
Critical Installation Errors
Double Gasket Problems
One of the most serious but easily overlooked mistakes during an oil change is leaving the old gasket from the previous oil filter stuck to the engine block. When a new filter is installed over it, the double layer prevents a proper seal, leading to massive oil leaks as soon as the engine starts.
To avoid this, always inspect the mounting surface after removing the old filter. Wipe it clean with a rag and visually confirm that the old rubber gasket has come off with the filter. If it remains attached, peel it off carefully before installing the new one.
Running the engine with two gaskets can cause the entire oil supply to leak out in seconds, resulting in catastrophic engine damage. A few seconds of inspection prevents a very costly mistake.
Cross-Threading Drain Plugs
Cross-threading occurs when the drain plug is forced into the oil pan at an incorrect angle, damaging both the plug and the pan threads. This usually happens when a socket wrench is used prematurely instead of starting the threads by hand.
To prevent it, always begin threading the plug manually. It should turn easily for several full rotations before tightening with a wrench. If resistance is felt immediately, back it out and realign it.
If threads are already stripped, options include using a thread repair kit, oversized drain plug, or replacing the oil pan in severe cases. Correct alignment and gentle tightening are the simplest ways to avoid costly repairs.
Oil Selection and Quantity Mistakes
Using Wrong Oil Viscosity
Choosing the incorrect oil viscosity affects both performance and durability. Oil that is too thick struggles to flow during cold starts, starving the engine of lubrication. Oil that is too thin can lose pressure at high temperatures, reducing the protective film between metal parts.
Always match the oil grade recommended in the owner’s manual (for example, 5W-30 or 0W-20). Using unapproved viscosity may also void the manufacturer’s warranty, especially in newer vehicles with strict emissions or turbocharging systems.
The right viscosity ensures smooth startups, proper lubrication under load, and consistent oil pressure in all conditions.
Overfilling and Underfilling Consequences
Both too much and too little oil can harm the engine. Overfilling causes the crankshaft to whip the oil into foam, reducing its ability to lubricate. Foamed oil can lead to oil starvation, pressure fluctuations, and even seal damage from excess internal pressure.
Underfilling, on the other hand, means not enough oil circulates to cool and protect vital parts. This leads to increased friction, overheating, and accelerated wear on bearings and piston rings.
To prevent either issue, fill oil gradually and use the dipstick to confirm the level is between the minimum and maximum marks. If the level is off, correct it before starting the engine.
Procedural Errors
Forgetting Oil Filler Cap
Leaving the oil filler cap off after an oil change is a surprisingly common and dangerous mistake. Without the cap, oil splashes out while the engine runs, coating the engine bay in oil and causing a strong burning smell as it contacts hot surfaces. In some cases, it can trigger a check engine light or cause a fire hazard.
To prevent this, always place the cap in plain sight—for example, on top of the air filter box—while draining or filling oil. This visual reminder ensures it is reinstalled before closing the hood. After tightening, double-check the seal and listen for any hissing or air noise on startup.
Improper Filter Tightening
An oil filter must be tight enough to seal, but not so tight that it damages the gasket or threads. The correct method is hand-tight plus three-quarters of a turn after the gasket makes contact with the mounting surface. Over-tightening can crush the gasket, distort the filter base, or make the next removal nearly impossible.
Before installation, lightly coat the gasket with fresh oil to help it seat evenly and seal properly. This small step reduces friction and ensures even compression when tightening. Proper torque prevents both leaks and future removal problems.
- Drain plug tightened to the proper torque specification
- New washer or gasket installed under the drain plug (if required)
- Oil filter securely hand-tightened and gasket lightly oiled before installation
- Old filter gasket removed from the mounting surface
- Oil filler cap reinstalled and secured after refilling
- Dipstick seated properly in its tube
- No tools or rags left in the engine bay or under the vehicle
- Oil level verified between the minimum and maximum marks on the dipstick
- Vehicle lowered safely from jack stands or ramps
Never start the engine if you're uncertain about any of these steps. Even a loose filter or plug can cause catastrophic oil loss within seconds.
Troubleshooting Oil Leaks After Oil Changes
If the oil light turns on after the change, shut the engine off immediately.
Identifying Leak Sources
Drain Plug Leak Diagnosis
A common source of post-service leaks is the drain plug area. Begin by inspecting it with a flashlight after running the engine for a few minutes. If oil drips or pools form beneath the plug, check for several potential issues:
- Damaged or missing washer: The crush washer or gasket under the drain plug ensures a tight seal. Reusing an old one or forgetting to install it often leads to slow leaks. Always replace it with a new washer of the correct size and material (usually aluminum or copper).
- Cross-threading: If the plug was forced in at an angle, the oil pan threads may be damaged. This causes oil to seep around the threads even when the plug feels tight. The only fix is to re-tap the threads or use a thread repair kit.
- Over-tightening: Excessive torque can strip threads or deform the sealing surface. Once the threads are compromised, the plug may never seal properly. In these cases, replacing the drain plug or, if necessary, the entire pan is the only long-term solution.
Filter Leak Detection
If the leak appears higher on the engine or near the filter housing, the problem likely involves the oil filter. Common causes include:
- Double gasket: An old gasket from the previous filter might still be stuck to the mounting surface. Installing a new filter on top of it prevents proper sealing and results in rapid leaks once oil pressure builds.
- Dry or damaged gasket: A gasket not lubricated before installation may tear or fail to seat evenly. Always apply a thin layer of clean oil to the gasket before tightening.
- Over-tightened filter: Crushing the gasket by overtightening causes it to lose elasticity and leak under pressure.
- Damaged housing: Cracks or worn threads in the filter mount or cartridge cap can allow oil to escape, even when the filter is properly installed. Replace the cap or housing if any visible defects are found.
After identifying the source, wipe the area clean and recheck it after a short idle period to confirm whether the leak persists.
Immediate Repair Procedures
Emergency Leak Stopping Methods
If a leak occurs shortly after an oil change and you cannot perform a full repair immediately, take temporary measures to prevent oil loss and engine damage:
- Tighten slightly: If the leak is minor, gently snug the drain plug or filter by hand or with a wrench. Do not overtighten.
- Use thread sealant or gasket paste: For small leaks at the drain plug, a small amount of high-temperature, oil-resistant thread sealant can provide a short-term fix.
- Monitor oil level frequently: Check the dipstick every few minutes of operation to ensure oil stays within the safe range.
- Stop driving if leaking continues: If oil drips rapidly or pressure light turns on, shut off the engine immediately and arrange for towing. Driving with an active oil leak can cause irreversible internal damage within minutes.
- Seek professional help: When unsure of the source or if tools are unavailable, have a certified mechanic inspect the car. Even a small leak can become catastrophic under high engine pressure.
Permanent Repair Solutions
Permanent repairs depend on the cause of the leak but generally involve reinstalling or replacing the faulty component:
- For drain plug leaks: Remove the plug, clean the threads, and install a new washer. If threads are stripped, use a heli-coil insert or replace the oil pan. Torque the new plug correctly according to the manufacturer’s specification (usually 25–30 ft-lbs).
- For filter leaks: Remove the filter, inspect the gasket surface, and clean it thoroughly. Lubricate the new filter gasket before reinstalling. Tighten by hand until the gasket makes contact, then give an additional three-quarter turn.
- For housing damage: Replace the cracked or worn housing cap. Avoid using thread tape or adhesives, as they can contaminate the oil system.
- For future prevention: Always replace crush washers, clean mating surfaces, and use a torque wrench for final tightening. Allow the engine to idle briefly after reassembly, then check for drips before lowering the vehicle.
By identifying the exact cause and applying precise corrective steps, oil leaks can be fully eliminated, ensuring clean operation and reliable sealing for the next service cycle.
Seasonal Oil Change Considerations
Winter Oil Change Preparations
Cold Weather Oil Selection
In cold climates, engines face greater friction and difficulty starting due to thickened oil. Using a lower-viscosity oil, such as 0W-20 or 5W-30, helps oil circulate faster at startup, reducing wear on bearings and camshafts. The first number in the viscosity rating (the one before “W”) indicates how easily the oil flows in winter temperatures. The lower the number, the better the cold-start performance.
Synthetic oil performs significantly better in cold conditions because its molecules remain fluid at much lower temperatures. It resists thickening, allowing for immediate lubrication even in subzero weather. This reduces the strain on the starter motor and battery while improving fuel efficiency during cold idling.
Drivers should also consider regional temperature ranges. For example, in areas where winter lows drop below –10°C (14°F), a 0W-rated oil is ideal. In milder regions, a 5W-grade oil often provides a good balance between cold-flow and high-temperature stability. Always confirm the recommended winter grade in the vehicle’s manual for optimal performance.
Winter-Specific Procedures
Changing oil in cold weather requires a few adjustments to ensure safe handling and effective results:
- Warm the engine first. Run the car for about five minutes to raise oil temperature slightly, allowing it to flow more easily during draining. Avoid over-warming; excessively hot oil can cause burns.
- Work in a sheltered or heated space. Cold tools, plastic funnels, and drain plugs can become brittle and more prone to cracking or slipping in freezing conditions.
- Check for slow flow. In cold environments, even warm oil may drain sluggishly. Allow extra time for complete drainage before reinstalling the plug.
- Inspect the filter seal carefully. Rubber gaskets can harden in low temperatures, reducing flexibility. Lightly warm the filter or apply a thin film of oil to help it seat properly.
Table : Winter Oils by Temperature
|
Ambient Temperature (°C / °F) |
Recommended Oil Viscosity |
Notes |
|
Below –25°C / –13°F |
0W-20 or 0W-30 |
Excellent cold-start flow for extreme winter climates. |
|
–25°C to –15°C / –13°F to 5°F |
5W-30 |
Balanced cold-start protection and operating stability. |
|
–15°C to 0°C / 5°F to 32°F |
5W-40 or 10W-30 |
Good protection for moderate winters. |
|
0°C to +10°C / 32°F to 50°F |
10W-40 |
Suitable for mild winter regions or transitional seasons. |
For cold climates, synthetic oils flow up to 50% faster at startup than conventional oils, reducing wear during the first seconds of ignition.
Summer Heat Considerations
High-Temperature Oil Requirements
In hot weather, engines operate at higher internal temperatures, which increases stress on the oil. High-quality oils with greater viscosity stability—such as 10W-40 or 5W-40—help maintain film strength under heat and pressure. The second number in the viscosity grade shows how well the oil resists thinning when hot.
Choose oils with strong thermal breakdown resistance and oxidation control, typically found in synthetic or semi-synthetic formulations. These oils prevent the formation of sludge and varnish that develop when oil burns at high temperatures.
Additionally, the oil works in coordination with the engine cooling system. When temperatures soar, oil carries away excess heat from pistons and bearings. Clean, properly filled oil ensures the cooling system functions efficiently and helps prevent overheating.
Table: Summer Oils by Region
|
Region / Climate |
Recommended Oil Grade |
Reason |
|
Hot, arid (Southwestern US, Middle East) |
10W-40 or 15W-50 |
Maintains oil film under extreme heat and heavy loads. |
|
Humid subtropical (Southeastern US, Southern Europe) |
10W-30 or 10W-40 |
Balances high-temperature stability with smooth flow. |
|
Temperate (Central Europe, Northern US) |
5W-30 or 10W-30 |
Suitable for wide temperature fluctuations. |
|
Mountain / High Altitude Regions |
5W-40 synthetic |
Stable under varying pressure and rapid temperature changes. |
Avoid using high-viscosity oil (15W-50 or 20W-50) in modern engines unless specified—thick oil can reduce flow and trigger low-pressure warnings at idle.
Hot Weather Safety Precautions
Performing oil changes in high temperatures requires extra caution to protect yourself and the vehicle:
- Allow the engine to cool. Never start draining oil immediately after shutting off a hot engine. Wait at least 20–30 minutes for components to reach a safe handling temperature.
- Use gloves and protective sleeves. Hot oil and metal surfaces can cause burns. Nitrile gloves and long sleeves reduce the risk of injury.
- Keep the workspace ventilated and shaded. Heat buildup in garages or driveways can cause dizziness and dehydration. Work in a shaded area and keep a fan or open door for airflow.
- Handle containers carefully. Oil expands in heat, so avoid overfilling drain pans or sealing hot oil in closed containers until it cools slightly.
Proper seasonal awareness helps maintain oil effectiveness year-round. Adjusting viscosity and handling procedures according to temperature keeps the engine fully protected in both extreme cold and heat.
Torque Specifications and Fastener Care
Drain Plug Torque Requirements
Manufacturer-Specific Torque Values
Correct torque is critical for sealing the oil drain plug without stripping threads or deforming washers. While 25–30 ft-lbs (34–40 Nm) is the most common range, each manufacturer specifies its own recommended value based on pan material and plug design. The table below provides general guidelines for popular vehicle brands:
|
Manufacturer |
Typical Drain Plug Torque (ft-lbs) |
Notes |
|
Toyota / Lexus |
27–30 |
Use aluminum or copper crush washer |
|
Honda / Acura |
29 |
Replace washer each oil change |
|
Nissan / Infiniti |
25–30 |
Avoid overtightening on aluminum pans |
|
Ford |
20–25 |
Some models specify torque in inch-lbs (consult manual) |
|
Chevrolet / GMC |
18–24 |
Many newer engines use steel plugs with O-ring seals |
|
Chrysler / Dodge / Jeep |
25–28 |
Confirm torque for aluminum pans |
|
BMW |
18–22 |
Use new crush washer every service |
|
Mercedes-Benz |
22–25 |
Torque evenly, avoid reusing old washers |
|
Audi / Volkswagen |
22–25 |
Check for plastic or composite drain plugs in newer models |
|
Hyundai / Kia |
25–30 |
Replace washer; verify thread condition |
|
Subaru |
31 |
Slightly higher torque for boxer-engine oil pans |
|
Mazda |
22–29 |
Aluminum washer recommended |
|
Tesla |
20–25 |
Applies to models with removable pan plug (serviceable variants) |
These figures serve as reference values. Always confirm the exact specification in the service manual for your specific engine model and oil pan type.
Torque Wrench Usage and Calibration
A torque wrench ensures consistent tightening and prevents overtightening—a common cause of stripped threads and oil leaks. Follow these best practices for accurate use:
- Select the correct wrench range. For oil changes, a 3/8-inch drive torque wrench with a 10–100 ft-lb capacity is ideal.
- Set torque precisely. Adjust the dial or digital display to the manufacturer’s specified value.
- Tighten smoothly. Apply slow, steady pressure until the wrench clicks or signals completion. Do not continue tightening beyond that point.
- Reset to zero after use. This relieves internal spring tension and maintains calibration accuracy.
- Check calibration yearly. Over time, torque wrenches lose accuracy. Most tool shops or calibration centers can test and recalibrate them to ensure reliability.
Proper torque technique guarantees leak-free sealing while preserving the longevity of the oil pan threads.
Oil Filter Tightening Specifications
Hand-Tightening Guidelines
Oil filters rely on gasket compression, not extreme torque, for proper sealing. The general rule is:
- Turn by hand until the gasket makes contact with the mounting surface, then rotate an additional ¾ turn.
For filters with printed tightening instructions, always follow the specific label guidance. Over-tightening can crush the gasket, distort the filter base, or make future removal extremely difficult.
Before installation:
- Lubricate the gasket with a thin film of fresh oil.
- Tighten by hand only. Avoid using wrenches unless the filter position makes it impossible to reach.
- After running the engine, check for leaks and retighten slightly if necessary.
Proper hand torque provides a uniform seal that expands slightly under oil pressure, preventing both leaks and gasket failure.
Cartridge Filter Housing Torque
Cartridge filter housings, often found in European and Asian vehicles, require precise torque to avoid cracking the cap or deforming the O-ring. The correct torque varies depending on housing material and design:
|
Manufacturer |
Typical Housing Cap Torque (ft-lbs) |
Notes |
|
BMW |
18–22 |
Use 86 mm 16-flute cap socket |
|
Mercedes-Benz |
20–25 |
Lubricate O-ring before tightening |
|
Volkswagen / Audi |
18–20 |
Do not overtighten plastic housings |
|
Toyota / Lexus |
25 |
Use metal-cap version socket for 64 mm |
|
Honda / Acura |
18–22 |
Inspect O-ring seating groove before installation |
|
Hyundai / Kia |
25–27 |
Replace O-ring every service |
|
Ford / GM |
22–26 |
Applies to newer cartridge-style EcoBoost and diesel engines |
Always use a torque wrench and the correct filter cap socket to ensure accuracy. Tighten evenly and stop immediately once the specified torque is reached. Over-tightening can lead to housing cracks, leaks, or O-ring extrusion, all of which risk oil pressure loss.
Never use thread sealant unless specified.
Oil Level Checking and Dipstick Reading
Check oil before long trips, not after.
Proper Dipstick Technique
Timing and Engine Conditions
Checking oil level accurately depends on both timing and engine temperature. After turning off the engine, wait at least five minutes before checking the oil. This pause allows the oil to drain back into the pan, giving a true reading instead of one skewed by oil still circulating through the engine.
For cold engines, oil will have fully settled, but readings might appear slightly higher because cold oil is thicker. For consistency, many technicians prefer checking oil when the engine is warm but not hot, meaning it has run briefly and then rested for several minutes.
Always perform the check with the vehicle parked on level ground. An uneven surface tilts the oil in the pan, causing inaccurate readings that could lead to overfilling or underfilling.
Reading Oil Film Accurately
Pull the dipstick out, wipe it clean with a lint-free rag, and reinsert it fully into the tube. Wait a moment, then remove it again to observe the oil film.
Check both sides of the dipstick since oil can cling unevenly. Identify the clean, consistent line where the oil film stops—this marks the actual oil level. Avoid confusing random splashes or streaks with the true reading.
Most dipsticks have holes, crosshatch areas, or lines that indicate the safe operating range. Oil should appear clear and smooth on the metal. If it looks cloudy, gritty, or has bubbles, it may indicate contamination or overfilling.
Oil Level Interpretation
Minimum and Maximum Mark Meanings
The minimum mark on the dipstick shows the lowest safe oil level for engine operation. Running the engine below this line can lead to oil starvation, poor lubrication, and severe internal wear. If oil barely reaches the minimum mark, add enough oil to bring it up midway between minimum and maximum, then recheck.
The maximum mark indicates the highest acceptable level. Filling beyond this point can cause foaming, crankshaft drag, or seal leaks due to increased pressure inside the crankcase.
The best practice is to maintain the oil level slightly below the maximum mark, ensuring optimal lubrication without the risks associated with overfilling.
Oil Condition Assessment
The dipstick also helps assess oil health, not just quantity. Examine the oil’s color, consistency, and smell:
- Golden or amber oil indicates clean, healthy lubricant.
- Dark brown or black oil usually means it’s nearing replacement but not necessarily harmful if still smooth in texture.
- Milky or foamy oil suggests coolant contamination, often from a leaking head gasket.
- Metallic sheen or glitter can indicate internal wear or bearing damage.
- Thick sludge-like texture means overdue oil changes or contamination buildup.
A quick visual and tactile inspection with each check gives early warning of potential issues long before they become serious. Regular dipstick checks are the simplest yet most effective habit for maintaining engine health and preventing costly repairs.
Environmental Responsibility and Oil Disposal
Used Oil Recycling Requirements
Legal Disposal Obligations
Used motor oil is classified as hazardous waste under environmental protection laws in most countries. It contains heavy metals, fuel residues, and chemical additives that can contaminate soil and groundwater if improperly discarded. Just one gallon of used oil can pollute over one million gallons of water, making responsible disposal essential.
Environmental agencies, such as the U.S. Environmental Protection Agency (EPA) and the European Environment Agency (EEA), require that all used oil be collected and sent to certified recycling or re-refining facilities. Pouring oil onto the ground, down drains, or into household trash can lead to severe fines and legal penalties, sometimes exceeding several thousand dollars.
Proper disposal is a shared responsibility among vehicle owners, mechanics, and businesses. Every oil change should end with safe containment and delivery of used oil to an approved recycling center or collection site.
Recycling Location and Procedures
Most auto parts stores, service stations, and municipal waste facilities provide free used oil recycling services. To prepare oil for recycling:
- Drain the oil into a clean, leak-proof container with a tight-fitting cap. Avoid using containers that once held antifreeze, chemicals, or paint, as residue can contaminate the oil.
- Label the container as “Used Motor Oil” to prevent confusion or mishandling.
- Store it in a cool, dry place away from direct sunlight and heat sources until it can be delivered.
- Transport it upright to the recycling location to avoid spills.
Some recycling programs also accept used oil filters and rags. Always verify local collection rules before dropping off materials.
Filter and Waste Material Disposal
Used Filter Recycling
Used oil filters retain up to half a quart of oil even after draining, so they must also be handled as hazardous waste. Recycling centers process them to recover both the steel casing and the remaining oil.
Before recycling:
- Puncture the filter dome and let it drain for at least 12–24 hours into the oil pan.
- Place the drained filter in a sealed plastic bag or container to prevent leaks.
- Deliver it to a recycling center that accepts used filters—many auto parts stores and local waste programs provide this service.
Once collected, filters are crushed or heated to extract residual oil. The steel shell is then melted down and reused, while the recovered oil is refined into new lubricants or fuels.
Contaminated Material Handling
Materials such as oil-soaked rags, absorbent pads, or sand used to clean spills must also be treated carefully. These items are saturated with petroleum products and cannot be disposed of in regular trash bins.
For safe handling:
- Place used materials in a sealed, labeled bag or metal container.
- Contact local waste management services to confirm how to dispose of oil-contaminated waste. Some municipalities offer designated hazardous waste drop-off days.
- Clean tools and funnels with degreaser or detergent, collecting rinse water separately to prevent contamination.
- Drain: After completing the oil change, pour used oil from the drain pan into a clean, leak-proof container with a secure cap
- Seal: Make sure the container is tightly closed to prevent spills or contamination. Avoid using bottles that once held coolant, chemicals, or fuel
- Label: Mark the container clearly as "Used Motor Oil." This helps recycling centers identify it quickly and prevents mix-ups
- Deliver: Take the sealed container to an auto parts store, municipal collection center, or authorized recycling facility. Many locations accept used oil free of charge
Store used oil in a cool, dry place away from sunlight and heat until delivery. Never pour it down drains, onto the ground, or into household trash.
Improper disposal of even one quart of oil can contaminate over 250,000 gallons of water. Always recycle responsibly.
Record Keeping and Maintenance Tracking
Oil Change Documentation
Essential Record Elements
Accurate record keeping ensures that every oil change is properly logged and traceable. A complete entry should include:
- Date of service – to monitor time intervals between oil changes.
- Mileage at the time of change – to calculate distance-driven since the last service.
- Oil type and viscosity – for example, 5W-30 full synthetic, ensuring the same grade is used consistently.
- Oil quantity added – to verify the correct fill amount for the engine’s capacity.
- Filter brand and model number – to track product reliability and compatibility.
- Next service due – projected either by mileage (for example, “Next change at 85,000 miles”) or time (for example, “Next change due April 2026”).
Keeping these details organized helps identify trends, confirm correct maintenance intervals, and prove compliance with manufacturer requirements.
Digital vs. Paper Tracking Systems
Both digital and paper-based tracking methods can effectively manage maintenance records, depending on personal preference and accessibility.
- Digital systems: Smartphone apps and online platforms such as Carfax Car Care, Simply Auto, or manufacturer-specific apps allow quick updates, reminders, and automatic scheduling. They can also store digital receipts and sync data across devices.
- Paper logbooks: A dedicated notebook or vehicle maintenance journal provides a physical record that can be stored in the glovebox. It’s simple, reliable, and accessible even without internet or device access.
Digital records are ideal for frequent travelers and tech-oriented users, while traditional logbooks suit drivers who prefer straightforward manual tracking. Many owners use both methods together for redundancy.
Warranty and Resale Value Protection
Maintaining Service Records
Detailed maintenance documentation is essential for warranty validation and resale value. Manufacturers require proof of proper maintenance to approve warranty claims, especially for engine repairs or lubrication-related failures. Without records, even a valid claim can be denied.
When selling a vehicle, a complete maintenance history builds trust with buyers and justifies a higher asking price. It demonstrates consistent care, which implies fewer mechanical issues and longer vehicle life.
Records also help mechanics diagnose issues faster by revealing oil types used, replacement frequency, and any irregularities in service intervals.
Professional Service Integration
If you alternate between DIY oil changes and professional service visits, maintain a combined log that includes both. Attach or scan receipts from professional services, listing performed work, parts used, and technician notes.
During inspections or major servicing, present your records so technicians can align their procedures with your vehicle’s maintenance history. This collaboration helps avoid redundant services and ensures continuity in oil type, viscosity, and replacement schedules.
Consistent and transparent record keeping transforms basic maintenance into a complete service history, strengthening warranty coverage, improving resale potential, and simplifying future diagnostics.
Special Situations and Advanced Techniques
High-Performance and Modified Engines
Racing Oil Requirements
High-performance and racing engines operate under extreme stress, high RPMs, and elevated temperatures. Standard engine oils cannot maintain film strength under these conditions. Racing oils are formulated with:
- High-temperature stability – to resist thermal breakdown above 300°F (150°C).
- Enhanced additive packages – including higher concentrations of zinc, phosphorus (ZDDP), and molybdenum for maximum wear protection.
- Optimized viscosity ranges – often slightly thicker oils such as 10W-60 or 20W-50 to maintain oil pressure under load.
These oils provide superior protection but require more frequent changes—often after every race or a few hundred miles of intense driving—since they lack the long-term detergents and stabilizers found in standard street formulations. Racing oil should never be used in daily drivers unless the engine is specifically tuned for it, as it can reduce catalytic converter life and increase deposits over time.
Turbocharged Engine Considerations
Turbochargers spin at speeds exceeding 150,000 RPM, generating immense heat and pressure. Oil plays a dual role—lubricating the turbo bearings and cooling the turbine shaft. For this reason, turbo engines demand full synthetic oils with exceptional thermal stability and resistance to coking (carbon buildup).
Recommended oils typically meet standards such as ACEA A3/B4, API SP, or manufacturer-specific specs like VW 504.00 or MB 229.5. Synthetic formulations prevent oil from baking onto turbo bearings, which can restrict oil flow and lead to turbo failure.
Although some turbocharged engines allow extended oil intervals (7,500–10,000 miles), many experts recommend changing oil more frequently—about every 5,000–6,000 miles—to remove heat-degraded residues and maintain optimal turbo health. After hard driving, always allow the engine to idle for 30–60 seconds before shutdown to let the turbo cool gradually, preserving oil integrity and bearing life.
Fleet and Commercial Vehicle Oil Changes
Let turbo engines idle before shutdown.
Volume Oil Handling
Fleet and commercial operations manage multiple vehicles simultaneously, requiring efficiency and cost control. These organizations often use bulk oil delivery systems connected to centralized tanks that store high volumes of oil in various viscosities. This approach:
- Reduces packaging waste and cost per quart or liter.
- Speeds up service times through metered dispensing hoses.
- Simplifies inventory tracking and ensures consistent oil quality.
Regular calibration of bulk dispensing systems guarantees accurate fill amounts for each vehicle. In large fleets, standardizing oil types across compatible engines minimizes confusion and simplifies storage management.
Efficient volume handling also includes proper waste management—dedicated collection tanks and professional recycling contracts ensure compliance with environmental regulations.
Schedule Coordination
Coordinating oil changes for a fleet demands precise timing and record keeping. Fleet managers typically use digital maintenance tracking software that logs mileage, service intervals, and oil consumption for every vehicle. Systems such as Fleetio, Samsara, or Geotab automate reminders and help prevent overlapping or overdue services.
Key practices include:
- Grouping vehicles by mileage or service cycles to perform batch maintenance efficiently.
- Using driver checklists to report oil level changes, leaks, or pressure warnings between scheduled services.
- Planning maintenance during off-hours to avoid downtime during operational periods.
Efficient scheduling reduces operational interruptions, prolongs vehicle life, and optimizes labor and oil resource usage across the entire fleet.
Engine Break-In Oil Changes
Never use synthetic oil before the break-in period ends.
New Engine Break-In Procedures
Initial Oil Selection
A new or freshly built engine requires a special oil formulation to help internal components wear in correctly. Conventional mineral-based oil is the preferred choice during the break-in period because it allows the piston rings to seat properly against the cylinder walls, ensuring optimal compression and oil control.
Break-in oils often contain higher levels of ZDDP (zinc dialkyldithiophosphate), a protective additive that prevents scuffing and wear on flat-tappet cams, lifters, and other high-friction components. This additive promotes controlled surface polishing while preventing metal damage.
Avoid full synthetic oil during break-in. Its superior lubricity can reduce the friction needed for parts to seat correctly, slowing or preventing proper ring sealing. Synthetic oil is appropriate only after the initial wear-in period is complete and the engine has stabilized.
Break-In Change Intervals
Fresh engines shed small amounts of metal particles and assembly residues during the first few hundred miles of operation. For this reason, the first oil change should occur after 500–1,000 miles (or as directed by the manufacturer or builder).
During this initial period:
- Monitor oil levels frequently to detect excessive consumption.
- Inspect the drained oil for metallic shimmer or debris—light particles are normal, but larger flakes may indicate improper wear.
- Replace both the oil and filter at the early interval to remove contaminants before they circulate.
After the first change, the engine can transition to the manufacturer-recommended oil, often semi-synthetic or full synthetic, for long-term operation.
Rebuilt Engine Considerations
Machine Shop Recommendations
When dealing with rebuilt or remanufactured engines, always follow the machine shop or builder’s specific break-in instructions. These guidelines are tailored to the materials, clearances, and components used during assembly.
Special attention is needed for camshaft and lifter break-in on flat-tappet designs. These parts rely on high-ZDDP oil during the first 20–30 minutes of operation at elevated RPM (typically 2,000–2,500) to establish proper wear patterns. After this initial run, allow the engine to cool completely before changing the oil and filter to flush out metal particles and assembly lube residues.
Assembly lubes used during engine build must also be purged during this early change. Leaving them in circulation too long can clog filters or interfere with oil flow.
Oil System Priming
Before starting a new or rebuilt engine for the first time, it is crucial to prime the oil system to prevent dry starts. This ensures immediate lubrication once the engine turns over.
Priming techniques include:
- Manual oil pump priming – Using a priming tool and drill to spin the oil pump shaft until pressure registers on a gauge.
- Pressurized pre-lube systems – Connecting an external pressurized oil tank to the engine’s oil gallery to circulate oil before ignition.
- Cranking without spark or fuel – Turning the engine using the starter motor for short bursts with ignition disabled to build initial oil pressure.
Once oil pressure is confirmed, the engine can be started safely. Let it idle briefly, monitor pressure, and check for leaks. Proper priming and early lubrication are the most effective defenses against premature wear or failure during the first critical minutes of engine operation.
Oil Analysis and Condition Monitoring
Understanding Oil Analysis Results
Wear Metal Interpretation
Oil analysis provides insight into engine health by identifying wear metals suspended in the oil. Common metals include:
- Iron (Fe): Indicates cylinder wall, crankshaft, or camshaft wear. Gradual increases are normal with mileage, but sudden spikes suggest excessive friction or poor lubrication.
- Aluminum (Al): Often points to wear in pistons or bearings. Rising aluminum levels may indicate overheating or detonation damage.
- Copper (Cu): Signals bearing or oil cooler degradation. Elevated copper levels often appear early in engine life or after rebuilds, but persistent high readings warrant investigation.
The key is trend analysis, not isolated results. Comparing reports over multiple oil changes helps reveal patterns—steady wear trends are acceptable, but sharp increases require inspection for problems such as low oil pressure, contamination, or improper viscosity use.
When abnormal readings occur, a follow-up oil change and re-test confirm whether the issue is ongoing or temporary.
Additive Depletion Monitoring
Oil contains additives that enhance lubrication, prevent corrosion, and control deposits. Over time, these additives degrade or become depleted. An analysis measures elements such as:
- Zinc (Zn) and Phosphorus (P): Represent anti-wear additives, typically from ZDDP compounds. A decline indicates reduced protective capability for camshafts and lifters.
- Calcium (Ca) and Magnesium (Mg): Reflect detergent and dispersant additives that neutralize acids and prevent sludge buildup.
- Boron (B) and Molybdenum (Mo): Act as friction modifiers and antioxidants, improving efficiency and longevity.
By monitoring these elements, labs can estimate the remaining useful life (RUL) of the oil. If additive levels drop below critical thresholds, it’s time to change the oil even if mileage seems low. Regular analysis allows optimized change intervals that balance protection with cost efficiency.
Visual Oil Condition Assessment
Color and Consistency Changes
Visual inspection remains a quick, practical way to evaluate oil health.
- Normal appearance: Fresh oil ranges from light amber to golden brown. It darkens gradually as it traps combustion byproducts.
- Abnormal dark or tar-like oil: Indicates oxidation or severe contamination, usually from overdue changes or overheating.
- Milky or cloudy oil: Suggests coolant contamination, often caused by a head gasket leak.
- Gritty or thick texture: Shows dirt or metal debris in circulation, signaling filter failure or internal wear.
If the oil thickens excessively or becomes opaque, it should be changed immediately. Visual checks between scheduled services provide early warning of mechanical or contamination issues.
Smell and Texture Evaluation
Your senses can often detect oil problems before instruments do.
- Fuel odor: Indicates fuel dilution, which can thin the oil and reduce its lubricating ability. It often results from frequent short trips or injector leaks.
- Sweet or chemical smell: Points to coolant contamination, which requires immediate attention to prevent bearing corrosion.
- Burnt odor: Reveals overheating or oxidation, possibly caused by restricted oil flow, low oil levels, or failing seals.
Texture also offers valuable clues. Rub a small drop of oil between your fingers—smooth oil feels slick and even, while rough or gritty texture suggests the presence of metal or carbon particles.
Regular sensory checks, combined with laboratory oil analysis, provide a comprehensive understanding of engine condition and oil health. This approach ensures timely oil changes, early problem detection, and maximum engine longevity.
Troubleshooting Oil-Related Problems
Oil Pressure Issues
Low Oil Pressure Diagnosis
Low oil pressure is one of the most critical warnings in any engine. It means the oil film protecting internal components has thinned or disappeared, risking severe damage within seconds. The causes can range from minor to catastrophic, including:
- Low oil level: Often the simplest cause. Always check the dipstick before deeper diagnostics.
- Clogged oil filter: A restricted filter limits flow and can trigger a pressure drop.
- Oil pump wear or failure: A worn pump cannot maintain proper circulation, especially at idle or high RPM.
- Excessive bearing clearance: In older or high-mileage engines, worn bearings allow oil to escape too quickly, lowering pressure.
- Improper oil viscosity: Using oil that’s too thin (for example, 0W-20 instead of 10W-40 in a hot climate) can reduce pressure, especially when the engine is warm.
Diagnostic procedure:
- Confirm oil level and condition.
- Replace the oil filter and verify correct viscosity.
- Install a mechanical oil pressure gauge to confirm actual pressure readings.
- Compare results with manufacturer specifications (typically 10 psi per 1,000 RPM is acceptable for most engines).
Immediate actions:
If pressure remains low or the gauge shows no pressure, shut the engine off immediately to prevent internal damage. Continuing to drive can lead to bearing seizure and complete engine failure.
Oil Pressure Light Troubleshooting
An illuminated oil pressure light doesn’t always mean catastrophic failure—it could also signal a faulty sensor or wiring issue.
To differentiate between electrical and mechanical causes:
- Check the oil level and add oil if low.
- Use a mechanical gauge to verify actual oil pressure. If the mechanical gauge reads normal, the problem likely lies in the oil pressure sending unit or its wiring.
- Inspect the sensor connector for corrosion or loose fit.
- If both the light and gauge indicate low pressure, stop the engine and inspect for leaks or pump failure.
Emergency response:
If the oil pressure light comes on while driving:
- Pull over and shut off the engine immediately.
- Check for oil level, visible leaks, or filter looseness.
- If no issues are found and the light persists, have the car towed to a repair facility. Restarting the engine without confirming pressure can cause irreversible damage.
Oil Consumption Problems
External Leak Detection
Excessive oil consumption often results from external leaks. These can be identified through a systematic inspection of the engine and surrounding components. Common leak points include:
- Oil drain plug – damaged washer or improper torque.
- Oil filter base – loose or double gasket.
- Valve cover gaskets – often seep oil onto exhaust components, producing burning smells.
- Oil pan gasket – leaks may appear along the bottom edge or near the transmission.
- Front and rear main seals – hidden leaks that drip from the crankshaft ends.
To confirm the source:
- Clean the suspected area thoroughly.
- Add UV dye to the oil and use a UV inspection light after running the engine for several minutes.
- Monitor for fresh leaks to determine severity.
Prioritize repairs based on leak rate and location—critical leaks near the exhaust or belt systems should be addressed immediately for safety reasons.
Internal Oil Burning
If no external leaks are found, oil may be burning internally within the combustion chambers. This typically results from:
- Worn valve guides or seals: Allow oil to seep into the cylinders when the engine is off or during deceleration.
- Worn or stuck piston rings: Cause oil to pass into the combustion chamber continuously during operation.
- PCV (positive crankcase ventilation) valve failure: Allows excessive oil vapor into the intake system.
Symptoms include blue exhaust smoke, higher oil consumption, and oily deposits on spark plugs.
In mild cases, switching to high-mileage oil can help. These oils contain seal conditioners that soften hardened rubber and reduce leakage past seals and guides. However, when oil consumption exceeds one quart per 1,000 miles, mechanical repairs are usually necessary.
Compression testing or a leak-down test confirms whether the problem lies in piston rings, valves, or head gaskets. Addressing the issue early prevents catalytic converter fouling and long-term performance loss.
- Stop the engine immediately. Pull over to a safe location and turn the engine off as soon as possible to prevent damage
- Check the oil level. Wait a few minutes for the oil to settle, then use the dipstick to confirm whether the level is low or the system has lost pressure
- Inspect for leaks. Look under the vehicle for fresh oil spots or drips that may indicate a loose drain plug or filter
- Do not restart the engine if the oil level is normal but the light remains on—this can cause bearing or camshaft failure
- Call for a tow or roadside assistance. Have the vehicle transported to a qualified mechanic for inspection and repair
Driving with the oil light on for even a short distance can cause irreversible engine damage. Treat it as an immediate emergency, not a minor warning.
Cost Analysis and Value Considerations
DIY vs. Professional Service Cost Comparison
True Cost Calculation
Performing your own oil changes often appears cheaper, but the true cost depends on materials, tools, time, and long-term value.
- Material costs: A standard oil change typically requires 4–6 quarts of oil and one filter. Depending on brand and type, this costs between $25 and $60 for conventional oil or $50 to $90 for full synthetic.
- Tool amortization: Essential tools such as ramps, a torque wrench, drain pan, and filter wrench may total $150–$200 initially but can serve for dozens of oil changes, reducing per-service cost over time.
- Time investment: A DIY oil change takes 30–60 minutes, including preparation and cleanup. Factoring in your personal time value gives a clearer picture of the total expense.
- Quality control: Doing it yourself ensures only the chosen oil and parts are used, avoiding shortcuts or mistakes that may occur in low-cost service centers.
In comparison, most professional shops charge $60–$120 for a synthetic oil change. While the upfront price is higher, this includes disposal, inspection, and warranty coverage for the work performed. A true cost comparison should weigh convenience and confidence against labor and equipment ownership.
When Professional Service Makes Sense
There are several situations where professional oil changes provide greater value:
- Warranty coverage: Newer vehicles under factory or extended warranties often require service documentation from certified facilities. This ensures compliance with manufacturer maintenance schedules.
- Accessibility challenges: Some cars have difficult-to-reach filters, electronic drain valves, or underbody covers that require special tools.
- Time efficiency: For busy owners, the convenience of dropping off a vehicle and picking it up an hour later may outweigh the small savings of doing it yourself.
- Diagnostic advantage: Professionals often perform visual inspections, topping fluids, and checking belts or leaks at no extra cost.
When tools, access, or warranty considerations apply, a professional shop can offer peace of mind and time savings that justify the cost difference.
Long-Term Engine Investment
Premium Oil Justification
Premium synthetic oils cost more upfront but deliver measurable long-term savings. They provide:
- Extended drain intervals – often 7,500–15,000 miles between changes, cutting annual service frequency in half.
- Superior protection – advanced base oils and additives reduce wear, resist oxidation, and maintain viscosity stability under extreme temperatures.
- Fuel efficiency – low-friction formulations can improve mileage by up to 2–3%, offsetting part of the higher cost.
When calculated across several years, premium oil can reduce total maintenance costs while extending engine life. For example, an engine lasting 250,000 miles with premium oil versus 180,000 miles with cheaper alternatives represents a significant total cost of ownership advantage.
Preventive Maintenance ROI
Oil changes are the single most cost-effective preventive measure for protecting an engine. Regular oil replacement:
- Reduces internal friction and heat buildup.
- Prevents sludge and varnish formation.
- Extends component life, delaying expensive repairs such as bearing or valve replacements.
Spending a few hundred dollars per year on proper oil maintenance can prevent repairs costing thousands, such as engine rebuilds or turbocharger replacements. In addition, a documented maintenance record increases resale value, as buyers trust vehicles with verified service histories.
The return on investment (ROI) of consistent oil maintenance is among the highest in automotive care—it saves money, sustains performance, and preserves long-term reliability.
Table: Annual Cost Comparison – DIY vs. Professional Service
|
Cost Factor |
DIY Oil Changes |
Professional Shop Service |
Notes |
|
Oil & Filter Materials (per change) |
$50–$70 |
Included in service ($70–$120 total) |
Varies by oil type and vehicle capacity. |
|
Average Changes per Year |
2 |
2 |
Based on 10,000–15,000 miles annually. |
|
Total Annual Material Cost |
$100–$140 |
$140–$240 |
DIY saves roughly $60–$100 per year. |
|
Tools & Equipment (initial investment) |
$150–$200 |
$0 |
Includes ramps, drain pan, torque wrench, filter wrench. |
|
Amortized Tool Cost (over 5 years) |
$30–$40/year |
$0 |
Tools pay for themselves after 2–3 years. |
|
Personal Time per Change |
45–60 minutes |
0 minutes |
Add value of your time when comparing. |
|
Estimated Annual Total (excluding time) |
$130–$180 |
$140–$240 |
DIY remains slightly cheaper long-term. |
Future of Oil Change Technology
EV owners should still check gearbox fluid and coolant yearly.
Extended Drain Interval Trends
15,000+ Mile Oil Technologies
Modern full synthetics use highly uniform base oils with high viscosity index, which resist thinning at high temperatures and thickening in cold starts. Additive packages improve oxidation control, deposit resistance, and wear protection. Detergents and dispersants keep contaminants suspended so the filter can capture them, which supports longer intervals.
Integration with the vehicle’s control modules helps stretch safe intervals. Oil life algorithms now account for load, trip length, temperature history, idle time, and start counts. When paired with higher capacity filters and low-ash formulations, many platforms safely reach 15,000 miles or one year between changes, provided the vehicle is driven in normal conditions and the correct specification oil is used.
Electric Vehicle Impact
EVs do not use engine oil, which shifts demand toward transmission fluids, thermal management coolants, and reduction gear lubricants. Hybrids still need engine oil, but frequent engine stop-start cycles change the stress profile. Low-viscosity synthetics with strong anti-oxidation performance and fast cold-start flow suit hybrids well. Service businesses adapt by adding battery thermal service, inverter coolant exchanges, and more comprehensive inspections to replace some of the oil-centric revenue.
Smart Oil Monitoring Systems
Real-Time Oil Condition Sensors
New sensors evaluate oil health directly, rather than estimating from mileage alone. Technologies include dielectric constant measurement for oxidation and fuel dilution, conductivity for contamination, optical turbidity for soot and sludge tendency, and micro-viscometry for real-time viscosity. Some designs sample droplets across a microchannel to infer shear stability.
These sensors connect to the vehicle network and to smartphone apps. Drivers can view remaining oil life, contamination alerts, and trend charts. Fleets benefit from dashboards that flag outliers, schedule bay time, and order supplies automatically. Predictive maintenance models spot abnormal wear patterns early, which prevents failures and optimizes drain timing.
AI-Driven Maintenance Scheduling
Machine learning models combine sensor data, historical analysis reports, ambient climate, driving style, and parts inventory. The output is a personalized interval that adapts over time. For example, an engine that sees short trips in winter may trigger earlier service due to fuel dilution risk, while steady highway usage in mild weather safely extends the interval.
Optimization algorithms coordinate oil changes with other services to minimize downtime. They can recommend the best viscosity and specification for a given engine, forecast filter loading, and simulate outcomes such as extended drains versus standard intervals. The result is fewer unnecessary changes, lower total cost of ownership, and protection aligned with how the vehicle actually operates.
Building Confidence Through Practice
Confidence in oil maintenance grows through hands-on experience. Start with straightforward oil changes, focusing on precision rather than speed. Over time, you’ll develop a natural rhythm—recognizing torque feel, spotting potential leaks, and selecting the right oil for any situation.
Each successful change builds mechanical understanding and self-reliance. With proper technique and care, maintaining your own vehicle becomes more than a routine chore—it becomes a skill that protects one of your most valuable assets for years to come.
Frequently Asked Questions About Oil Changes
1 How often should I really change my oil?
2 Can I switch from conventional to synthetic oil?
3 Is it OK to mix different oil brands or types?
4 What happens if I overfill the engine with oil?
5 What should I do if my oil light turns on while driving?
6 Can I reuse the drain plug washer?
7 Why does my oil look black right after a change?
8 Should I warm up the engine before changing oil?
9 Can I change oil without ramps or jacks?
10 How can I tell if my oil filter is leaking?
11 What type of oil is best for cold winters?
12 How do I dispose of used oil properly?
13 What happens if I skip an oil change?
14 Do oil life monitors really work?
15 What tools do I need for a DIY oil change?